Mr. Romano's RET Site
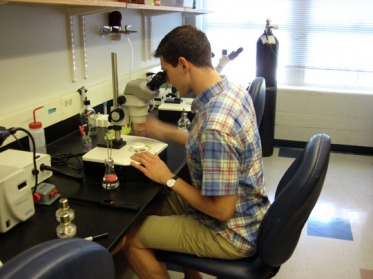
On the scope...
RNAi
RNAi (or RNA interference) is a protocol involved in much of the molecular genetics work we do in the lab. Through this procedure we can "feed" the worms a particular genetic message that destroys the mRNA transcript produced during protein synthesis. As a result, we can hatch a generation of worms missing an entire gene or protein, and observe the phenotype that results. The beauty of C. elegans is that this entire process can occur in just one week!
Step 1: Inoculation and Worm Chunking
In order to get a particular RNAi sequence inside the worm, we insert a specially-created plasmid into E. coli, the favorite food of the worm. The first day of this protocol involves inoculating a bacterial culture with this plasmid and preparing a population of worms that will be able to eat this bacteria later in the week. We call this preparation "chunking" the worms, since we take a chunk of agar with worms from an old plate and add it to a fresh agar plate.
Inoculated Cultures
Chunked Plate
Step 2: Seeding Worm Plates
Here I'm doing what we call "seeding worm plates." In each test tube there are E. coli that have digested and transformed the RNAi plasmid for a particular C. elegans gene. When the worms eat these E. coli (their favorite food!) the RNAi will then go to work targeting and destroying the mRNA transcript for the gene at hand. By seeding the worm plates, what we're doing is squirting the E. coli onto an agar plate to make a lawn of bacteria. When we add the worms the following day, they will have plenty of bacteria to eat.
Step 3: Egg Prep
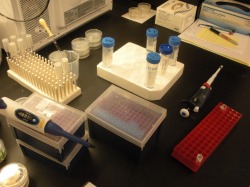
Egg Prep Set-up
On the third day we want to add the worms to the plasmid-containing bacteria and allow them to eat and reproduce. In order to control the ages of our worms and keep them all about the same age, we prepare an egg prep. Essentially we dissolve away all of the worms themselves with a mixture of bleach and NaOH, but the eggs have a hard covering of chitin that protects them. We add all of the eggs to the lawn of plasmid-containing bacteria we grew on the first day and when the eggs hatch they eat the E. coli and ingest the plasmid. The RNAi goes to work disrupting gene expression over the next several hours as the worms grow.
Step 4: Observe Phenotypes
By the fifth day all of the eggs from the third day are adults. If the RNAi was successful and the gene you selected has observable phenotypes, you'll now see the results of what happens when a particular gene or protein doesn't form. Here are some links to some notable phenotypes on WormClassroom:
Dumpy: http://www.wormclassroom.org/movies/dpyHalf.mov
Uncoordinated: http://www.wormclassroom.org/movies/uncHalf.mov
Roller: http://www.wormclassroom.org/movies/RolHalf.mov
Dumpy: http://www.wormclassroom.org/movies/dpyHalf.mov
Uncoordinated: http://www.wormclassroom.org/movies/uncHalf.mov
Roller: http://www.wormclassroom.org/movies/RolHalf.mov
Yeast Two-Hybrid
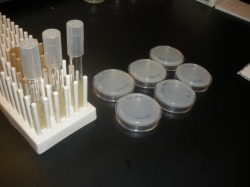
This is another type of experiment we do in the lab. Through this protocol we can examine the level of interaction between different proteins. We take strains of yeast with different proteins selected and prepare a master plate with both our controls and the proteins we're testing. Each experimental strain contains two proteins that we are comparing with one another. We then transfer the yeast from the master plate to four different types of media. Three of these (Ura, 5FOA and His+3AT) are incubated, cleaned and observed a few days later to determine what level the two proteins interacted with one another. The fourth plate (YPAD) undegoes an XGAL assay to confirm protein interaction.
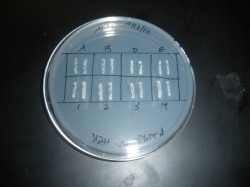
Y2H Master Plate
Master Plate Preparation
In this particular experiment, the controls are labeled A-E and the experimental strains are 1-4. Note that we prepare two streaks of each strain for an added control element.
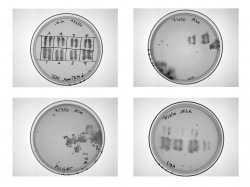
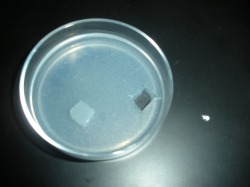
Ura, 5FOA and His+3AT Results
Here are the results of the first three tests. In general, growth on the Ura and His+3AT plates indicate protein-protein interaction, while the 5FOA is the negative marker and indicates no protein-protein interaction as shown in the top control strains. In this particular experiment, our results indicate no interaction between the proteins being studied.
XGal Assay
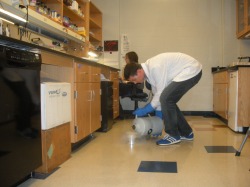
The XGal assay involves plating the colonies on nitrocellulose paper. After incubating, they are frozen using liquid nitrogen and further incubated on a mix of chemicals that will produce a color change to indicate protein-protein interaction.
Pouring the Liquid Nitrogen
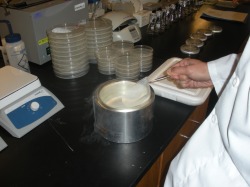
Freezing the Samples
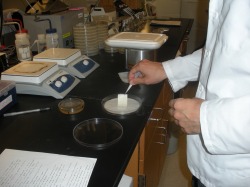
Adding the Chemicals
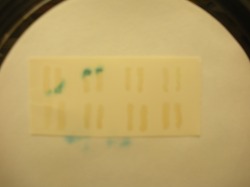
XGal Results
Results
Here are the results of the XGal Assay. In general, growth indicates protein-protein interactions as shown in the two top control strains. [Note: This image is a mirror image of the photographed results of the above tests for comparison.] In this particular experiment, our results confirm no interaction between the proteins being studied.